Failed Engineer

Friday, 31 December 2021

Pantorouter analysis - Point tracing, Sweep volume and Clash analysis

Product engineering and manufacturing has several aspects related to it, and one of which is digital product development. The aim of digital product development is to model the design virtually and conduct all studies related to the design digitally, so that we expend least amount of effort in creating it, in real life and with minimum resources. For example, in case you are designing a piston, you may want to simulate mechanical load conditions, and analyse the maximum stress and keep it under elastic limit of the material.

Depending upon the product that you are modelling, your design requirements may change. For example, before manufacturing an engine, it may be of interest to find if the different parts would clash with each other during the motion. Or you may wish to graph valve position with respect to crank rotation etc. 

Tuesday, 28 December 2021

Surface toolbar

Surfaces toolbar comprises of tools like Extrude, Revolve, Sphere, Cylinder, Offset, Sweep, Fill, Offset, Blend etc. You can see all of the tools present in the attached picture. There are a few differences with regards to the sketch as we used it in the part-design workbench. 

Surfaces toolbar
If you remember, in the part-design workbench we read about the conditions that need to be met for a valid sketch. You can read about them here again if you have forgotten. Nonetheless, the condition i.e. sketch should not be open does not apply in surfacing and you can use a closed as well as open sketch for making a surface.

Sunday, 24 January 2021

College projects for mechanical engineering students

As part of curriculum, engineers need to complete a significant project at a college level which either demonstrates understanding of the topic or solves some existing engineering problem. While there's no dearth of topics for engineering students to explore, however, in my opinion, budget becomes a problem since it may involve buying material to create a project and demonstrate problem solving ability. An alternative to this is using Catia or CAD to demonstrate problem solution or demonstrate problem solving ability. I have listed below four such projects and you can use ideas similar to the ones I have mentioned below.

Using animate constraints to solve simple mechanism problem

The sketcher workbench in Catia, offers a tool known as = Animate constraints. This tool can be used to solve simple problems that may be related to four bar chain mechanism or some other simple mechanism. For example, you can make combination of sketch profiles in 2D, resembling an engine and can animate it.

Using this, you can find out several parameters of interest like if for a certain connecting rod length, crank length etc. will clearance be enough or not. This is ofcourse the simplest example, and you can read more about it here. Another application of the tool can be found here.

Thursday, 21 January 2021

Decathlon Btwin mybike - Review

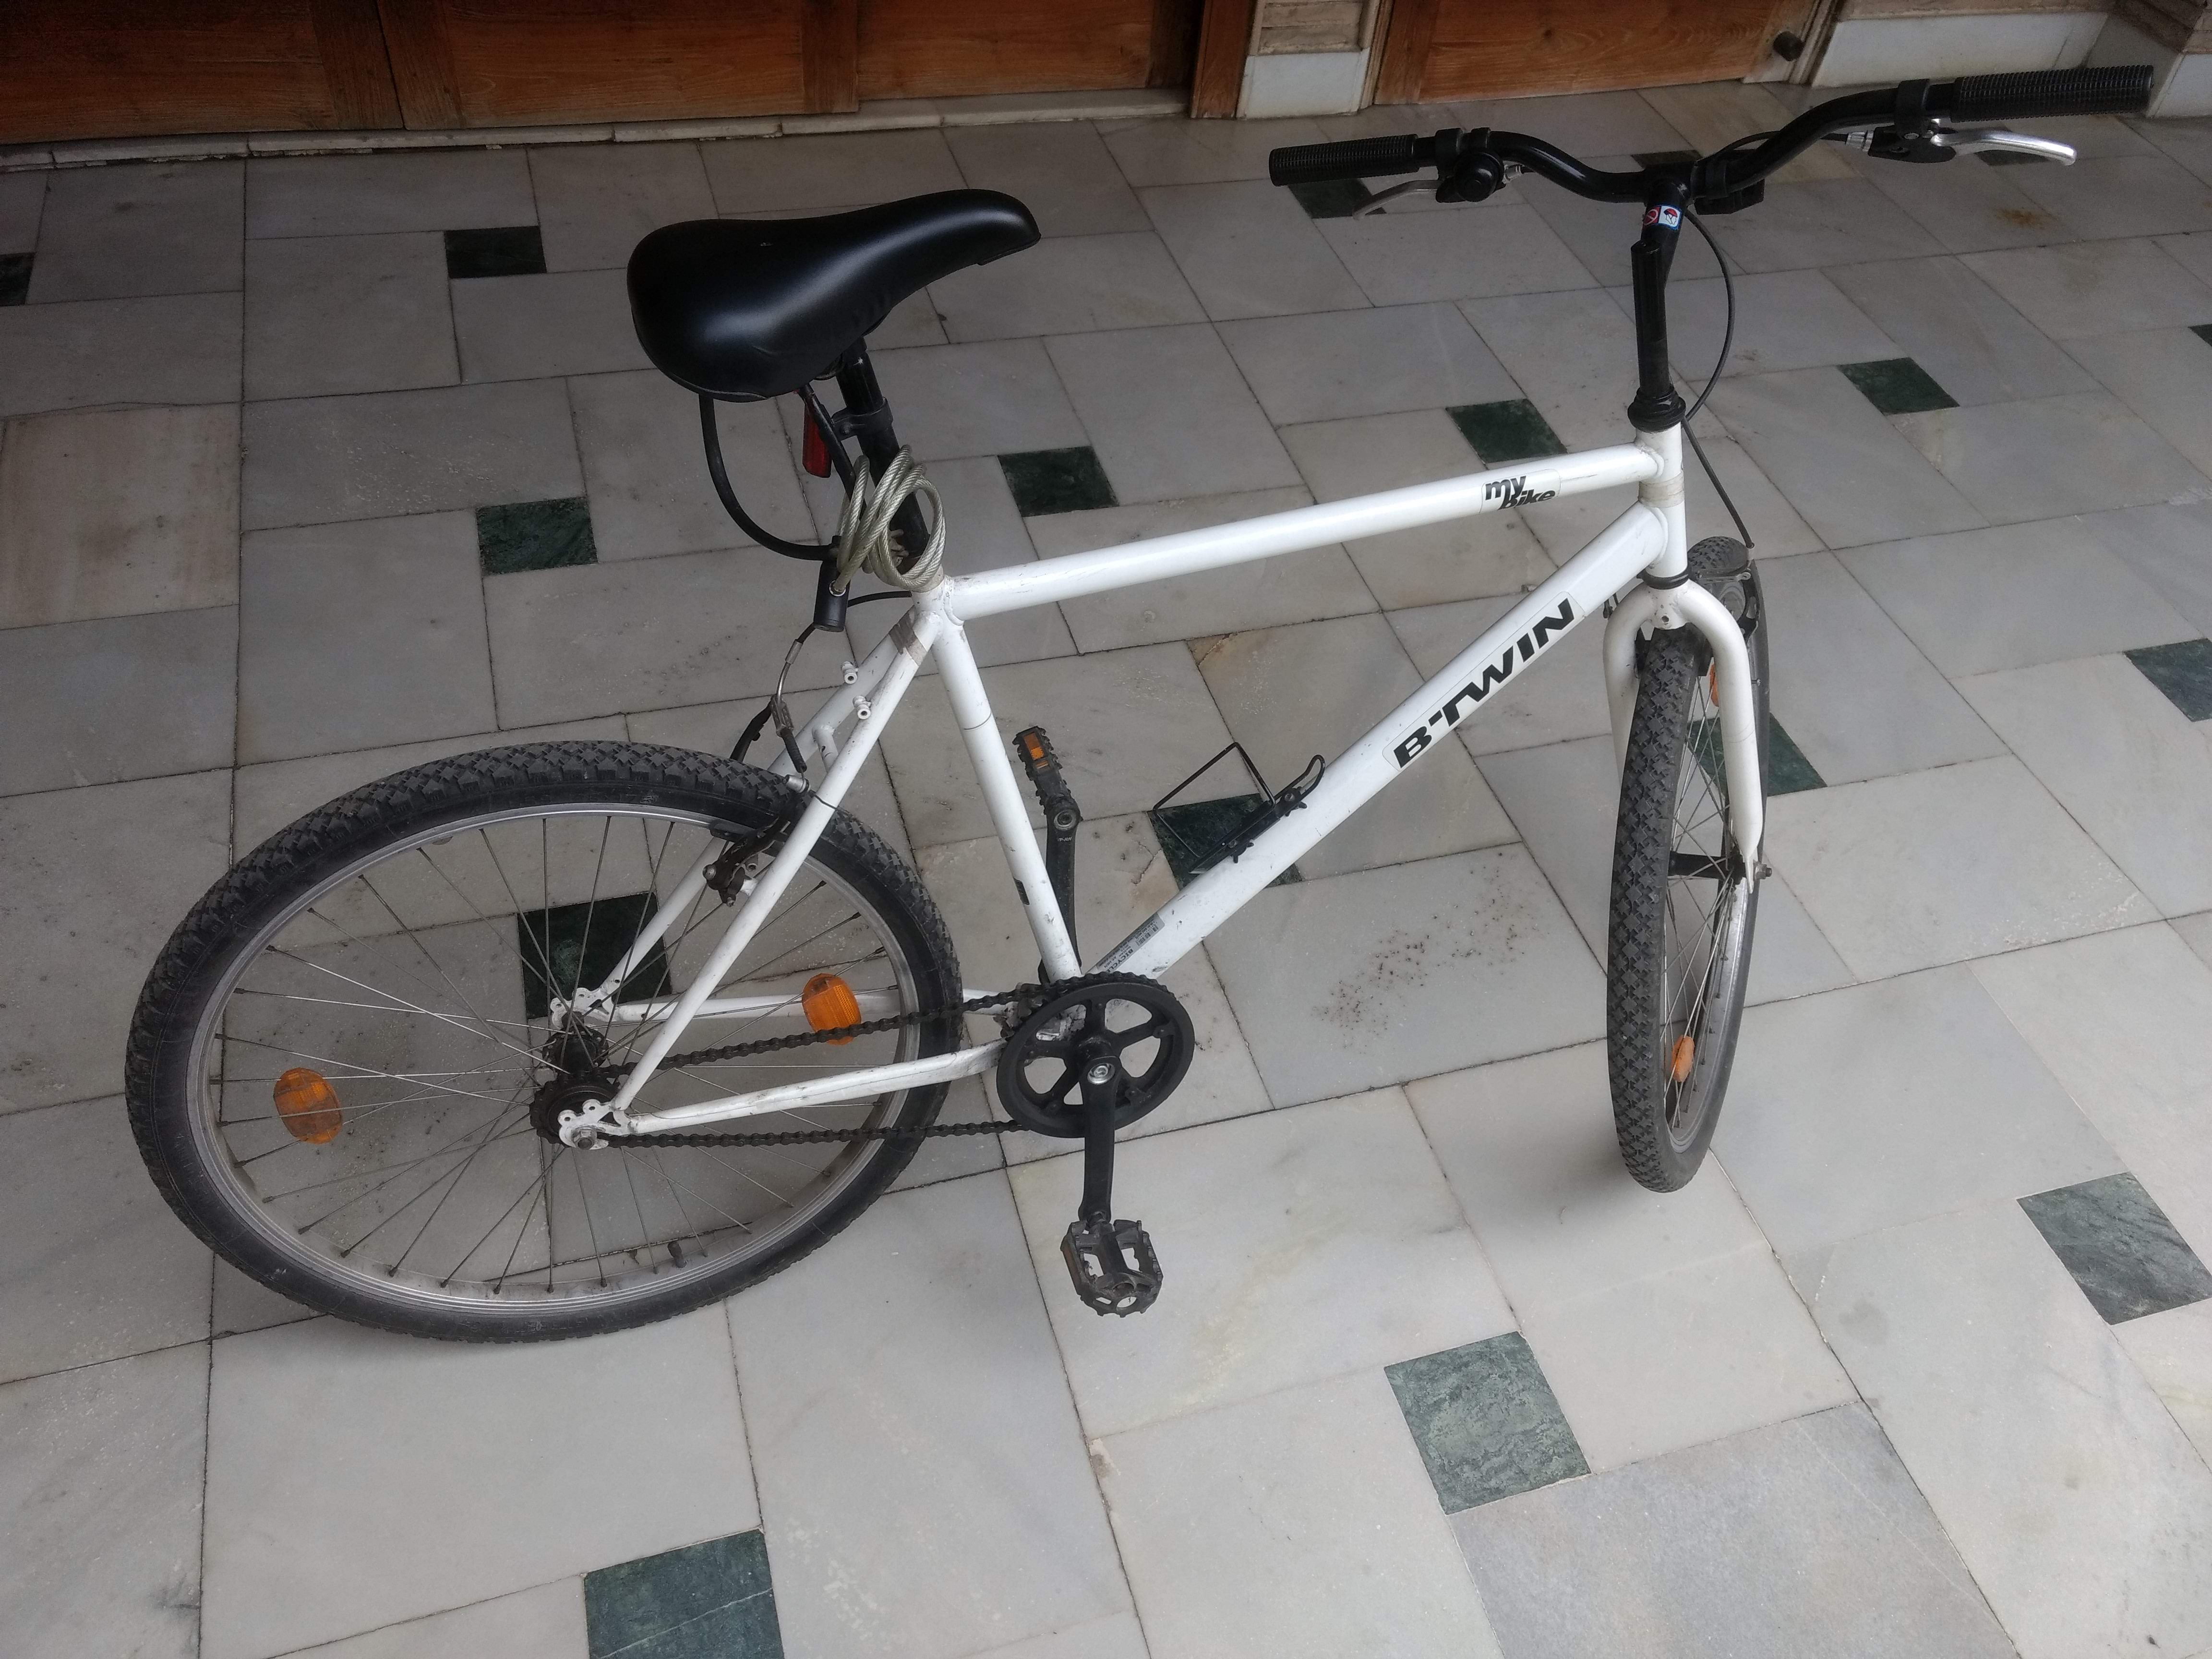
At the time of writing this post, I am thirty four years old and the bicycle is slightly over two years old. I am telling you this, just to establish that I have ridden quite a few bicycles in my lifetime and also that I have owned Btwin mybike long enough to provide you a comprehensive and reliable review of the product. 

Btwin - mybike

Monday, 18 January 2021

M.A (Psychology) - Project - IGNOU

It was a detour indeed considering I graduated in engineering. Nonetheless, sometime back I enrolled myself in the post-graduate psychology programme. I recently completed the course - M.A. (Psychology) from IGNOU and I thought I would put my project online to help others. It may serve as a general guidebook for anyone who's attempting to take on a new project and wish to conduct proper research in psychology. I should perhaps also mention that if you have decent knowledge of the two subjects - Research Design and Statistics, studying this project report and making use of it to design your own would be a cinch. This page would be of only general help and would let you know of the ways in which I collected data, combined it, analysed it and interpreted it. With this post, I intend to provide information related to the practical challenges that arise during research, these are essentially areas which a person may overlook due to lack of practical experience. 

Saturday, 19 September 2020

Reversing direction - Single phase motor

Before you buy motor for an application, it's better that you know how it's wired and if the direction can be easily changed or not. You can easily change the direction of a three-phase induction motor which has three output wires (i.e. wired as star or delta in stator) by simply interchanging connections of two of the stator leads. For example if previously the connections phase were RST, interchanging the leads would change the phase to RTS or SRT and the direction would change.

Reversing direction of a three-wire, three-phase induction motor

Unlike a three phase motor, reversing direction of a single phase motor can be a bit complicated. This is the problem that I recently had to face. I bought an old table saw and it came with a single phase motor and I had to reverse the direction of this motor. I would have used the motor in default configuration by simply using it from the other side, but it would have meant that the nut may get loose during operation which can be dangerous, so this is something that had to be done without fail. I followed the steps mentioned below to complete the task.

Wednesday, 16 September 2020

Designing parametric gear in Catia

Gears can fundamentally be classified according to the profile of the teeth. The profile of the teeth may be involute, cycloidal, trochoidal or even a combination of these profiles. 

Involute profile in red

The involute profile is basically a path traced by a point on a straight line which rolls without slipping on the circle. The circle is called the base circle of the involute. 

Epicycloid in red
The epicycloid is the path that's traced by a point on the circle as it rotates outside a circle, while hypocycloid is the path traced by a point on the circle as it rotates on the inside of another circle.

Wednesday, 9 September 2020

Using variable draft & parameters in Catia to model glass-bottle cap

Making parts and assemblies, driven by a set of parameters has always fascinated me. The post is an attempt at showing, how we can leverage a set of a few commands / features and make the part easily modifiable by associating these features with the desired, predefined and well-known parameters. The concept applies to assemblies too. However, for the sake of simplicity, I have used part as an example and not used many features to avoid complication and challenges that may arise with explaining the example itself. So, my main focus is on demonstrating the concept and how you may do such a thing. The example itself, that I have demonstrated may not have any practical utility as such, however the concept itself can of course be applied, and is applied to vast range of problems.

Sunday, 16 August 2020

Motion control boards and G-code translators

Before I discuss the motion control boards and G-code translators, I would just like to mention some names, just for the sake of making you aware of the options that exist. LinuxCNC, Arduino, BeagleBone, UCCNC, PoKeys, AcronCNC, Mach4, TurboCNC, MASSO, PMDX, PICO Systems, Smooth steppers - (ESS - Ethernet smooth stepper and USS - USB smooth stepper) etc, are some of the solutions that you can go with. The names that we have mentioned include G-code translators as well as motion control boards. It makes sense to mention them together since they are interdependent. The choice of motion control board will dictate the G-code translator that you can go with, likewise if you have made up your mind about a particular G-code translator, you can only with a particular motion control boards. This is because of compatibility, and it is for this reason, we should know about a motion control board's compatibility with a particular G-code translators. In addition, we should know which product can get us started easily and make an inexpensive choice. Let's discuss these one by one and demystify them little bit.

Saturday, 15 August 2020

Motors and Drivers

As we know that relative and synchronized axis movement is required to produce complex shapes and parts that we desire. Such motion is created with the use of either stepper motors, servo motors or hybrid motors.
Relative axis movement in a CNC machine
The choice of motors is dictated majorly by cost and precision required for the machines. A similar size stepper motor will always be cheaper than a servo or a hybrid servo motor. A stepper is more likely to be suitable in low load conditions like in case of a 3D printer, Plasma cutting, Fibre laser machine etc. and are can provide low to moderate speeds. A servo or hybrid step-servo motor is more applicable for high load conditions like CNC milling, CNC lathe etc. Servo and hybrid step-servo motors offer feedback and therefore can be utilized to their full potential without keeping a large safety margin in torque as you may do in a stepper motor.

Sunday, 9 August 2020

Practise - Animate constraints

If you have practised sketcher long enough, animating constraints should be an easy thing to do. And there are many ways to do this. In this particular exercise, we are basically creating four separate profiles within the same sketch, the DOF (Degree of Freedom) of these profiles is not restricted in anyway and they can move relatively freely with respect to each other at first. Subsequently, the aim is to animate piston profile, crank profile and connecting rod profile movement within a cylinder and case profile. Therefore, they are applied constraints keeping in mind the motion they would undergo. Below you can see the profiles that are created.

Thursday, 6 August 2020

Balloon generation, Dimensioning, Dress-up & Annotation

After creating all required views on the drawing sheet, applying dimensions, creating parts and assembly numbers along with relevant annotation, tolerance, machining symbols, welding symbols etc. is the next logical step in creating drawings. We will see how we can apply these. 

Creating balloons

Having an exploded view in drawing along with part numbers in balloons can help parts assembly process. Creating it is also easy, however, you should have the parts positioned in the location in the assembly environment and create that view in drawing. After creating the view, you may want to isolate that view since updating the part / view would disturb the drawing. Before we generate balloons, you may want to modify a few settings using the path Tools > Options > Mechanical design > Drafting > Generation tab and Annotation and Dress-up tabs. 

Monday, 27 July 2020

How to find Catia file version and release information without using Catia?

Catia files are forward compatible i.e. you can save a Catia V5R18 file in Catia V5R19 or above easily without any issues and can prevent the specification tree history. However, it does not offer backward compatibility i.e. files modeled in later release cannot work with prior version perfectly and you will lose specification tree if you open it. Also, you should not save the file else you will also not be able to open it in the release it was modeled and it will be corrupted. 

Thursday, 23 July 2020

Title block, Sheets, Bill of materials & Properties

Before we discuss dimensioning and other important aspects of the drawing creation, it makes sense that we talk about other complimentary aspects of the drawing creation. These topics relate to creating title block, adding sheets and modifying properties etc.

Inserting sheet and detail sheet

Sheet

The sheet you are working on, may get full. So, you can either increase the sheet size that you are working in, or you can add additional sheet. We saw how to set drawing sheet, and change projection method and sheet size, if you don't remember, you can see it here. To add a new sheet. you can use the drawing toolbar, or use the path Insert > Drawing > Sheets > New sheet. The new sheet you add will be shown in the specification tree as well as a tab on the top.

Monday, 20 July 2020

Creating drawings in Catia - View toolbar - 2

Remaining tools in the view toolbar can be accessed using the same path i.e. Insert > Views or by using the views toolbar itself.

Creating drawings in Catia - View toolbar - 1

Instead of using wizard to create views, you can also use the Views toolbar. Tools in the view toolbar can also be accessed using the path Insert > Views. Keep in mind, that this toolbar is different from the View toolbar that we have already studied. 

Thursday, 16 July 2020

What is the practical application of animate constraints in Catia?

Like many other people, I have played with animate constraints tool present in sketcher workbench, and have had my share of fun in the past. However, today I am going to talk about the way in which this tool can actually be used, so that you become more oriented about its significance and understand one more way in which it can save you some time. One of the most commonly used suspension system in an inexpensive car is MacPherson strut with a control arm and a stabilizer bar and perhaps other one is with a sturt and two control arms, or some other derivative of this. 

Wednesday, 15 July 2020

Setting drawing sheet and using wizard

These are two ways to create views, if you chose to create an empty sheet while opening the drafting workbench instead of preset views. 
  • Using a wizard
  • Custom
You may even use a combination of the two, where some of the view may be created using wizard while other using views from the views toolbar. Regardless of the method you choose, as a first step, you should always setup the drawing sheet. In this, you may setup the projection method, sheet size and scale to be used for views. In case you are satisfied with the standard you selected while defining the sheet, you may not do this.

Tuesday, 14 July 2020

Drafting - Introduction

Engineering drawings are important for many reasons. Before you start to create a drawing, make sure a part or an assembly document is open for which you wish to create a drawing. To create these drawings, there's a specific workbench in Catia that you can use. The workbench is different and is nothing like AutoCAD. You can navigate and open the drafting workbench by using the path Start > Mechanical Design > Drafting.

Opening drafting workbench

Monday, 13 July 2020

Re-use pattern, Sectioning, Save management

We mentioned re-use pattern when we discussed Product structure tools and constraints, however we did not see it practically. Also, there are other concepts worth understanding with regards to an assembly. Let's see them one by one. 

Re-use pattern

Re-use pattern let's us make use of pattern used in part to instantiate and assemble parts easily and quickly. Consider the plate shown below where one of the hole was created originally using hole command, while rest were simply patterned. Now, in an assembly, we are required to put bolts in all holes. To do this, we would only assemble one of the bolt in its place using constraints like offset, coincidence of the axis etc. And that is what is shown below, we assembled one bolt in one of the hole.
One bolt assembled with plate

Friday, 10 July 2020

Creating top-down assembly, Copy and paste, Assembly features

How to create a top-down assembly in Catia?

Making a top-down assembly is same as making a bottom-up assembly, to the extent that you would need to apply the constraints in the same way as you applied during the bottom-up assembly. However, in case of the top-down assembly it is required that we start with an assembly file and make all parts from within that particular assembly file, unlike in case of bottom-up assembly, where we called already modeled parts and assembled them. 

For the top-down assembly, we would create a three part assembly. By creating this assembly in the top-down manner, we would learn how to effectively navigate between product / part environments and modify parts and assemblies from within the single document. The drawings for these parts are present below. We have kept the parts simple for the sake that you can practise easily.

Top-down assembly - Assembly and Parts drawing

Tuesday, 7 July 2020

Creating bottom-up assembly

To create a bottom-up assembly, you would require already modeled parts saved in a folder. If you have not made the parts or do not wish to make them, you can download the parts using this link. These parts have been made using Catia V5R21, so you can use the same release or higher to work with these parts.

Assembly file, Product1 created

Product structure tools, Constraints, Move toolbar

Creating an assembly requires use of tools that are specific to the Assembly design workbench. Creating bottom-up assembly or even the top-up assembly requires knowledge of these basic tools. These tools are present under Product Structure tools toolbar, Move toolbar and Constraints toolbar. Let's first study these tools and then we will move to creating an assembly. 

Product structure tools

Product structure tools toolbar has the tools for creating new part or product files from within the workbench environment which you may do in a top-down assembly process. It also has tools for bringing in the parts that have been already created for the purpose of assembly. In addition, it also has some other relevant tools.  Below you can see all the tools that are present in this toolbar. Let's see these tools one by one.
Product structure tools toolbar

Thursday, 2 July 2020

Practise exercise 2

The exercise below can be made using part design workbench as well as surface design workbench. Modeling the part is quite straightforward. After making the centre hub, you can proceed with modeling blades, which would require you to model it with the use of curves whose details are provided.
Exercise

Tuesday, 30 June 2020

Practise exercise 1

Below you can see the exercise for practise. The exercise if fairly easy and part can be made in about 30 minutes. This is by no means a part ready for production, since it does not take into account the snap surfaces or draft etc. Nonetheless, it's good for practise since with this exercise, you will come to use many tools that you have studied so far. 

Exercise

Monday, 29 June 2020

Assembly design workbench

What is an assembly?

An assembly or a product, in general, refers to the collection of different parts and assemblies, that together perform a required function. For example, an engine that comprises of piston, crankshaft, camshaft etc. is an example of an assembly. In Catia, an assembly is basically a document with .CATProduct extension that stores information about the collection of different components (parts, assemblies etc.) that the assembly constitutes, and all these parts are held in position / assembled together at their respective working positions. So wherever you open this assembly document, it displays all parts and assemblies that the document constitutes.

Assembly shown with specification tree

Geometrical sets and Hybrid design

Whenever you create a new part file, you are asked to enter the part name and also given the option to create geometrical set and ordered geometrical sets. So far we did not opt for these options due to the risk of complicating things. You can create geometrical set or ordered geometrical set, or even both in a partbody at the start by selecting the suitable option while providing the name of the part. 

Option provided when new part file being created
Alternatively, you can use the path Insert > Geometrical Set to create a set in case you did not create it at the time of part creation. Also, there's an option that is selected by default 'Enable hybrid design', let's see what's the purpose of these and what do they do. 

Saturday, 27 June 2020

Operations toolbar

As the name tells us, operation toolbar is used to apply operations on already created surfaces or wireframe. These operations are aimed at either making surface elements are one by joining them, cutting them, moving them etc. 
Tools present in operation toolbar

Thursday, 11 June 2020

Wireframe toolbar

Wireframe geometry as well as sketches forms the basis of the surfaces that you wish to create and it forms the basis of surface designing. You can access the tool present in the Wireframe toolbar from the toolbar itself or you can use the path Insert > Wireframe. The tools present in the toolbar can also be seen below.
Wireframe toolbar
We have already seen the tools like Point, Line and Plane. These are the same options that we used in Part-design for creating reference elements, and can be used in the same way as we used them previously. We will now look at the new tools that are particular to the Wireframe and Surface design workbench.

Tuesday, 9 June 2020

Introduction to surface design

There are many workbenches in Catia in which you can model surfaces, these are Wireframe and Surface Design, Generative Shape Design, Freestyle workbench etc. These workbenches have some similar tools while other are typical to the workbench you are working in. Nonetheless, you can mix-match tools from all these workbenches together with part design to model a product. 

We will restrict ourselves to Wireframe and Surface design workbench, which has all the relevant tools that we require to model complex surfaces for the purpose of making aesthetically appealing products. 

Monday, 8 June 2020

Making seventh part

This is perhaps the easiest exercise that requires just two steps. You need to model the section and a centre curve about which the section will be swept to create the 3D model. 
Exercise

Thursday, 4 June 2020

Making sixth part

The exercise below is quite easy. You may be tempted to model this using solid combine feature. However, there's a rather easier way to make it. You can go about modeling a tear-drop shape first by using shell command and then successively making holes and pockets as desired and this will give you the desired part.
Exercise

Tuesday, 2 June 2020

Making fifth part

In comparison to the last part you modeled, this should be relatively easy. Due to the reason that there are similar features and sketches for these can be easily copied and utilized multiple times.

Exercise

Sunday, 31 May 2020

Measure toolbar

We have so far been only modeling parts without taking into consideration like how much does the part weigh? Also, while designing parts, you may need to immediately know (without going into drafting workbench) what's the angle between two faces etc. You can do all of it using Measure toolbar.
Measure toolbar
Measure toolbar has three tools
  • Measure Between
  • Measure Item
  • Measure Inertia
Measure Between and Measure Item

The tools, Measure Between and Measure Item can be accessed from within each other's dialogue box, since both of these options include each other as suboptions and are actually grouped if you see below. The dialogue box below opens up and it has all the tool available for measurement.
Tools that can be accessed using Measure Between and Measure Item

Measure between - Measure between can be use to measure between any two points, lines, two surfaces, or even between any entity of your choice. You can change the selection mode to avoid picking any entity by mistake. Suppose if you wish to measure between two points, you can select mode as 'Point only' instead of 'Any geometry'.

Friday, 29 May 2020

Properties, Apply material and Graphic properties toolbar

In one of the previous post, we studied the graphic properties toolbar. The same graphic properties in addition to others like mechanical and feature properties can also be accessed using mouse right-click. You can right click on Part body or planes such as XY, YZ, ZX etc. to modify the properties of elements.

Properties of elements, bodies, planes can be accessed using right click
 
A distinction needs to be made that you can not only modify the properties of the entire Part body, but also a particular face of certain solid or a surface etc. This access to the properties of the element are available with the right-click of the mouse i.e. you can right-click on the particular element whose properties you wish to change and subsequently apply the properties. 

Saturday, 23 May 2020

Boolean operations

What are boolean operations?

Boolean operations in Catia are just like boolean operation that you may have studied in mathematics or a subject called sets. It's not exactly the same and somewhat different and is more suited for modeling. In Catia, this is known as multibody concept. For that matter in most softwares, this is referred to as multi-body concept.

Common sets operations taught in school 

In Catia, boolean operation are applied between two bodies. So, unless you have two different bodies, you cannot apply the boolean operations. Boolean operations are available under Insert > Boolean operations. You can also apply boolean operations using the respective toolbar.

Wednesday, 20 May 2020

Knowledge toolbar

Knowledge toolbar in Catia comprises of many tools like formula, design table, law etc. These tools can help us build parts based on our mathematical and engineering-design knowledge. With the use of this, we can integrate the knowledge into the model itself and can replicate / modify parts with somewhat greater ease. Let us see how all these tools and options work.
Knowledge toolbar

You would be aware that in engineering design, we use knowledge of various principles. For example, in case of a beam, the section width may have certain relation with height, or thickness. We also know many other geometric relations like an equilateral triangle has equal sides, rectangle's opposite sides are equal etc. Catia can effectively integrate into the design itself using formula.

Catia can also deal effectively with fog i.e. functions i.e. f(x). You can see some of the sample functions that Catia can work with using this link. Before we can work with functions or formula, there's a more fundamental thing you should know about - parameters, since it lays foundation for defining functions as well as formula and makes them more meaningful and understandable. Let us now, how we can define parameters, relations and use them.

Thursday, 14 May 2020

Making fourth part

The part appears to be a casting. To make the part below, I would suggest you to download the image first using right click. Modeling the part is very straightforward and easy. We need to first make the complete sketch using the dimensions as shown below. The section view provides information about the depth of pockets and extrusion of profile.  
Exercise

Wednesday, 22 April 2020

Transformation features toolbar

Transformation features toolbar
The transformation features toolbar comprises of several sub-toolbars like scale toolbar, patterns toolbar etc (see image). which we will discuss ahead. Other than the sub-toolbars, mirror tool is also present in the transformation features toolbar. I should mention that most of the time you will find yourself using only some of the tools like Scale, all types of patterns and mirror. So if you find some of the tools hard to understand, you can skip them and just learn the ones that I just mentioned.

In the image attached, you can see the black dropdown buttons along with some of the tools. Upon clicking them you can see that they are actually sub-toolbars and have other tools too. You can drag the toolbar out to see the complete sub-toolbar and its name.

Tuesday, 21 April 2020

Surface based features

Surface based features toolbar
Making a part solely with the part design workbench may not be possible. Therefore, at times, it may be required to use surfaces and we may create them in the Surface design workbench. The surfaces we create are put to use with the help of tools available in the surface based features toolbar. The surface based features toolbar comprises of tools like Split, Thick surface, Sew surface and Close surface. Let's see each none of them in detail.

Monday, 20 April 2020

Dress-up features toolbar

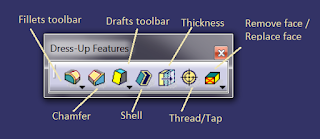
Dressup features toolbar
Dress up features toolbar, as the name suggests, has set of tools that are used for applying cosmetic features such as fillet, chamfer, draft etc. While tools like corner or fillet are available in sketcher too, it's advisable not to use them and instead apply such features in the part design workbench. It make the sketch simpler and modification easier. These features are generally applied towards the end, keeping in mind the standards that are being followed.

Editing parts in Catia, Parent-child relationship and Define in work object

Editing parts that you have made already, may involve redefining sizes for features like pad, pocket etc, reordering certain features, even deleting the features.

Redefining size - Redefining size is easy, and you need to double click on the feature on the solid, it may be pad, pocket, shaft etc. or on the specific feature in the specification tree for which you wish to change the size. In the dialogue box that opens up, you would be able to change its size as per need. This is essentially the same box that was presented to you using which you specified the size.

Friday, 17 April 2020

Making third part

The drawing on your right can be used to make a 3D part. The top view and the front view sufficiently describe the part.

Exercise
We may first proceed to make the base of the part, followed by the top section containing two holes of diameter 8mm. Subsequently, we may create the two sections with hol of dia 25mm. In this exercise, we will demonstrate, how to use selective parts of a sketch, copy and pasting the sketch, changing sketch support and using a positioned sketch to orient sketch as per our needs.

Using only certain parts of sketch, Positioned sketch and Sliding sketch

So far, we have used complete sketches for part creation with all our sketch based feature tools. We can use as many closed profiles in the tools as we want. However, we have never used only certain selected profiles present in the sketch. What if, we wish to use some profiles within the sketch for part creation and ignore the others? We can do this with the use of command "Go to profile definition".
How to use selective parts of sketch?

Making second part

The exercise is quite simple and can be completed in a couple of steps. Perhaps, we can first start with solid combine feature and combine two sketches, that should give us a majority of the part that we wish to create. Secondary features like through holes, pad, pocket etc. can be made next.

Exercise
An alternative way might be that we create a solid with 60mm width and 46mm depth and 48mm height and then carve out material step by step that's not supposed to be there.

Thursday, 16 April 2020

Making first part

The exercise is relatively easy, the beginners however may have trouble figuring out how to approach and where to begin. This has a lot to do with lack of practise with options that can be used for creating reference planes and other reference elements. If you have not practised reference elements and are not familiar with the various options that exist, it's better to practise that first.

Exercise
The part can be made with the use of pad, hole and stiffener commands. We may need to make a couple of sketches for this on different planes. Once you see someone make it, it becomes relatively easy since it give a perspective as to how such a problem can be approached. Going further, you would be able to come up with more unique ways to make such parts.

Design Intent

From skeletal model to final product
A parametric design software not only helps creates a 3D model of the part / product for manufacturing, but also captures the relationship between the different features that are used in their creation. It is for this reason the tool is considered extremely powerful. The relationship between different features is captured, so that a change made to certain feature would automatically update other features that are related to it in some way. So in case if you want to build a robust model / design that's easily editable and make future changes easier. It's important that some amount of thought is given to the intent of the design.

So basically, design intent is forethought that's given before you embark on the process of detailed designing.

Wednesday, 15 April 2020

Reference elements toolbar

Reference elements toolbar
For making a solid model, default planes XY, YX and ZX may not always be sufficient and leave a designer wanting for more planes on which he can sketch and make complex parts easily. Also, you may not be able to specify direction for extrusion easily in case you wish to choose to specify direction with lines which are not coplanar with the default planes. So, reference elements help in more than one way and help extend the flexibility that the designer has at his disposal. Also, reference elements like points aid the creation of lines, and lines aid the creation process of planes and vice-versa.

Tuesday, 14 April 2020

Introduction to part modeling and Sketch based features

Part modeling refers to the creation of 3D models that are exact representation of the actual product that we wish to manufacture. These need to be the exact representation because based on this, the tooling is created or machine program is generated for manufacturing. The primary aim of making a sketch is to utilize it to make a 3D part. Therefore, a sketch is made keeping in mind the tools that are available in the part design workbench or other workbenches that we intend on using. The Part Design workbench comprises of variety of tools that help the designer convert the sketch into 3D model. Some designs may be difficult to model directly in the Part Design workbench. Therefore, to model those parts we take help of Wireframe and Surface design workbench, sheet metal design and other workbenches. We will see in a bit, how we use a sketch to make a part.

Following are some of the 3D parts, modeled in Catia.


Sketch based features

Sketch based features toolbar
The sketch based features toolbar is present in the part design workbench. It comprises of tools like pad, pocket, rib, slot, shaft, groove, hole, multi-sections solid etc. Each of these is a way to add / remove material in a certain way. Also, these have different requirements for sketches. Some of these are used for adding material while other are used for removing material. For example, pad, rib, shaft and multi-sections solid are used for adding material while hole, pocket, groove etc. are used for removing material.

Tuesday, 31 March 2020

Evolution of tubelight hardware - Indian context

At the time of writing this post, I am 33 years old. So, whatever I write is a result of documenting my observation in life of little over thirty years. I did not research how things were before I was born, and I doubt if there's a source that can provide me a good historical perspective. If you know it, please provide a link in the comments section.